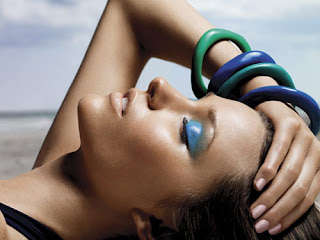
Wedding Day Makeup Tips


Wedding Day is the most important day in the life of a woman and every young girl desire to look at her best on this blessed day in her life. Here are some tips to make you look as gorgeous as a queen:

- Use heavy-pigmented cream foundation and layer it with powder foundation to make the skin look smoother.

- Use powder foundation on neck, ears and chest too so that you don’t seem to have a highlighted face.

- Use a concealer shade similar to the foundation and mix both well.

- Learn some camouflage makeup tricks and buy its products to use on your big day.

- If you have combination skin, use water based foundation and a dry sponge.

- Hide the under eye circles by applying concealer. Blend it towards the nose and use downward strokes.

- For a perfect eye shape, use a small brush to blend a medium tone color from just below the brow arch downwards in a semi-circle motion.

- Use light peach eye shadow as eyelid base.

- Choose lip liner that blends easily with lipstick for that soft glossy look that looks good in photographs too.

- Place the focus on the face either on eyes or on lip and underplay the other with neutral pink or brown shades.

- Thin and small lips look more sensuous with light lip colors while fuller lips can use deep shades.

Wedding Day Makeup Tips

Wedding Day Makeup Tips

Wedding Day Makeup TipsWedding Day Makeup Tips
Wedding Day Makeup Tips

Wedding Day Makeup TipsWedding Day Makeup Tips
Wedding Day Makeup Tips
Read more »

Floral Baths Beauty Tips


The Romans, Egyptians and oriental women were known to have very fastidious beauty and bathing routines. For them, bathing was a major social event. They also promoted the healing powers of warm water to which various herbs, salts and flowers were added, thus ensuring health-giving qualities to their baths.

MIXED HERBS AND LEAF BATH:-Take a handful of bay leaves. rosemary and chamomile leaves. Put all these together in a piece of muslin. Tie it tight and soak this bundle in your bathtub or water bucket in slightly warm water for half an hour. The fragrance permeates into the water. Remove the bundle of muslin and gently rub it all over your body and then bathe with the fragrant water. This bath is most relaxing and helps tone up the body.
FLORAL BATH:-Chamomile flowers, rose petals or fragrant tube roses. even agrimony, wrapped in a muslin cloth or bag. soaked in water would have the same toning and smoothening effect upon your skin.

MILK BATH:- traditional elaborate bath that literally ‘feeds’ your skin! Considered to be the very height of luxury, it was used by Nero’s wife. Poppaea, and has since been a favorite over the years. Poppaea bathed in donkey’s milk and water. Several innovations have been introduced to make tills a fascinating bath regime. It’s easily made at home.
Take Half Litre Milk. To this add 2 tablespoons of honey. Add strained chamomile juice or the juice of crushed rose petals obtained by infusing them in water. Mix all these and pour the mixture into warm bath water. Soak yourself in the bath­tub. or keep pouring slowly over your body. rubbing all over. Be leisurely about this. After the milk and flower water has been used up. You could bathe with normal cold water.

BATH FOR DRY SKIN:-Take 200 ml. of glycerin. and add to this 200 ml. of rose water. Pour this in a bottle. Smear this all over your body and beginning at the neck, start rubbing it in gently as you go downwards, to your arms. torso, legs and back. Continuously massage the mixture into your skin. nourishing it. Once the solution is absorbed into the skin take a normal bath using a glycerin-based soap.

ALM0ND BATH:-This is also an ideal solution for people with a dry skin. It should be used especially during severe winters when even normal and oily skins tend to dry up. You should use this treatment instead of soap. Take a piece of muslin. crush a few almonds and tie them in it. Wet your body: rub this almond bag allover your body vigorously. Keep adding a little water and continue scrubbing. This immediately exfoliates without damaging your skin and at the same time it nourishes the skin with its natural oils.

VINEGAR BATH:-Those with an oily skin problem should definitely try this. Take a mug water and add to it a little malt vinegar. Mix well and massage your body with this diluted vinegar water. Take a bath with cold water and feel the difference.

Floral Baths Beauty Tips

Floral Baths Beauty Tips

Floral Baths Beauty TipsFloral Baths Beauty Tips
Floral Baths Beauty Tips

Floral Baths Beauty TipsFloral Baths Beauty Tips
Floral Baths Beauty Tips
Read more »

Cell Phones And Cancer


Decades ago, doctors ardently debated whether cigarettes had adverse health effects. Nowadays, cell phones are in the spotlight.

In the never-ending battling between experts trying to determine whether or not cell phones do in fact lead to brain cancer, chalk one up for the “no” category in the latest round.

The Journal of the National Cancer Institute just published a study that tested the effects of cell phone usage on children and adolescents. The study included 1,000 people and compared a control group in good health with a control group of people diagnosed with brain tumors.

The result showed that children who started to use cell phones regularly five years ago were at no greater risk than those who had never used them regularly. In a subset of the study, no increased risk of brain tumors was discovered for brain areas receiving the largest amount of exposure.

That’s good news, but it still comes on the heels of a World Health Organization study that determined cell phones are possibly carcinogenic.

With so much money in the cell phone industry, it looks like straight answers regarding the risks will be hard to come by.

Cell Phones And Cancer

Cell Phones And Cancer

Cell Phones And CancerCell Phones And Cancer
Cell Phones And Cancer

Cell Phones And CancerCell Phones And Cancer
Cell Phones And Cancer
Read more »

How To Protect Your Skin In Summer


Our internal health is always depicted from our face and in such a hot whether these days one has to take extra care of their skin. If you have to go out in the sun light then the skin loses its natural moisture.

Whenever you have to go for shopping or somewhere out for work place or school, do apply sun screen lotion on your face and that's the best skin care tip in summer. This protects your skin from UV rays and keeps the PH level of your skin balanced. If your skin is prone to the sun light you'll see red patches (mild or severe) on your skin and it will either get too dry or too greasy. This is a sign of sun burn.

Before going out in the sunlight you must take care of few things to protect yourself from the harmful effect of sunrays.

You should wear cotton suit before going out in the sunlight especially the one which can cover you up enough for example your arms etc.
For summer skin care, apply sun screen lotion to protect yourself from UV rays.
Skin serum minimizes the effect of sun burns and it improves the texture of your skin. Its one month use helps you to get rid of half of the wrinkles.

One summer skin care tip is that you must avoid applying a lot of make up during the summer; because the layer of makeup clogs the pores of your skin that follows by awful acnes.
The area around the eyes is the most sensitive part of your face especially when the sun light is reflected from some metal object it damages the eye sight very badly. The best solution is to wear those big sunglasses and aviators that cover almost all the sensitive part of your face and the best part is that they look really ravishing and glamorous on everyone. Freckles also appear when you are directly under the sunlight so you shouldn’t ignore them assuming it’s a deficiency of calcium.

One very effective summer skin care tip is that after coming back home rinsing your face with a face freshener should be must! Rose water is a very economical yet effective remedy for that matter. You can put the bottle of rose water in the fridge and spray it on your face every once or twice a day. It will help you wipe off the dirt and impurities of you face.

Following are some of the home made exfoliator and sunscreens that you can make and apply for healthy skin; one thing is that such organic ingredients are free of any chemical or synthetic products and they contain no side effects.

Homemade Sun Screen

Lemon juice, rose water and glycerin of the same quantity, put it in a bottle and refrigerate. Before going out in the sun, apply this concoction on your face, neck, arms and feet.

Cleanser

Massage of saffron mixed with olive oil on your hand, feet, face and neck improves the blood circulation level and gives a natural glow to your skin.

Mixture of yogurt and turmeric powder helps cleansing your clogged pores and blemishes dry. Mash some banana with aloe vera gel and apply it on your sun burn skin for example arms, hands and feet that are tan as compared to other part of your body and face, massage gently and rinse off. Do it once or twice in a week, you'll for sure see some good results.

However, you should keep a constant watch on your diet and meditate regularly to keep your skin glowing and even young. Drink loads and loads of water to ditch the heat wave and stop taking stress because the more beautiful and positive you are from within, it will surely reflect from your face.

How To Protect Your Skin In Summer

How To Protect Your Skin In Summer

How To Protect Your Skin In SummerHow To Protect Your Skin In Summer
How To Protect Your Skin In Summer

How To Protect Your Skin In SummerHow To Protect Your Skin In Summer
How To Protect Your Skin In Summer
Read more »

Glamorous Eye Makeup For Evening


Evening parties offer the freedom to use all the sheer you want to use in your makeup. Here's how to do a stunning eye makeup for evening in just 10 minutes:

Step 1: Firstly, apply three dots of concealer under each eye. Starting from the inner corner where skin tends to be darkest, then under the pupil and the third on the outer edge. Pat, never rub with your ring finger until it disappears.

Step 2: Now, apply eye base to your eye lid. It will fix the eye shadow for hours.

Step 3: Apply a three-toned eye shadow. Start with a light color, then use a medium color and finally, end with a darker color. Let them blend well.

Step 4: Put on the eyeliner.

Step 5: Now, use a highlighter to pop your eyes. For this, draw a v-shape from top to bottom and blend with your fingers.

Step 6: Now highlight your eye brow with the same highlighter.

Step 7: Curl your lashes with an eyelash curler.

Step 8: Lastly, put on the mascara on your lashes.

And that's all... You're done with stunning, dramatic eye makeup.

Glamorous Eye Makeup For Evening

Glamorous Eye Makeup For Evening

Glamorous Eye Makeup For EveningGlamorous Eye Makeup For Evening
Glamorous Eye Makeup For Evening

Glamorous Eye Makeup For EveningGlamorous Eye Makeup For Evening
Glamorous Eye Makeup For Evening
Read more »

Tips For Healthy Long Hairs


Growing long, beautiful and healthy hair is not an extremely difficult process. It does not require a multitude of salon hair products, handfuls of expensive vitamins, nor any sort of sacrifice to the long hair gods. What it does take to grow your hair long and keep it in good condition is common sense, dedication, and a lot of patience. Indeed, growing long hair is actually more a question of what you shouldn't do rather than what you should!

For the sake of comparison with your own hair, at the time of the writing of the first edition of this guide my hair was 33" long, very straight, fine (pertaining to the thickness of each hair), reasonably thick (pertaining to the thickness of my hair as a whole) and had no gray (that's changed... I'm hoping for a streak!). Please feel free to experiment and tweak the below steps to best suit your own hair type and hair growth goals.

1. The first step to growing long, beautiful hair is by far the most important. It is absolutely non negotiable for anyone who wants healthy hair at any length, but it is also by far the hardest step you will have to follow. Because there is absolutely no way to repair damaged hair, you must start out with healthy hair to have healthy hair when it's long, there's no way around it. Bite the bullet and remove every inch of hair that is considerably damaged, reminding yourself that it's the most important step to take towards your long hair goal and that this is the last time you will ever have to do it. If you are going for extreme hair length, from this point on you will have to treat your hair at all times like delicate, antique lace. Once your hair is at your waist the ends can be as many as six years old, and your hair will go through a lot of trauma in those six years no matter how careful you are with it. Because damaged hair will only get worse as time passes, it is especially important your hair be in excellent condition from the very beginning.

Remember, long damaged hair is never as pretty as shorter healthy hair, and because healthy hair needs to be trimmed less often and doesn't break as easily, the result is much faster growth overall. I learned this step the hard way and wasted ten years trying to grow damaged hair I refused to cut... hair that started literally growing like a weed when I finally gave in, did the dirty deed and stopped doing all the horrible nasties that initially resulted in the damage. Duh. Learn from my pain.

If your hair is not very damaged too far up the length of the hair shaft, you may start with a very healthy trim and then continue to trim monthly to maintain your hair length until all the damage is gone; however, keep in mind that if the amount of damage does not continue to decrease using this method, you didn't remove enough of the damaged hair to begin with and another healthy trim is in order. You'll save precious time by removing as much damaged hair as possible from the very beginning and immediately implementing the steps that follow to your now beautifully healthy hair!

2. Always trim your hair often. Damage to your hair will move up from the ends and the only way to stop it in its tracks is to remove it as soon as it happens. Use good tools to trim your hair, using anything else can actually encourage more splitting down the road! It's important the scissors or shears you use be very sharp, made specifically for cutting hair, and used for nothing else. The small investment you make in a good pair of hair styling scissors will pay off many times in the long run. Trim hair a half inch every month or so (the average rate of hair growth) if you are maintaining your length. If you are actively growing your hair, trim it a half inch every three or four months. In between trims it is beneficial to sit in bright light and snip any splits off the ends of individual hairs with your good scissors. Don't forget to explain to the men in your house that these are your hair tools and are absolutely not to be used for anything else, especially prying off bottle caps when they can't find the bottle opener, which is of course in the drawer where it belongs if they'd just look. I digress. If you are persistent with this method, regular trims may be able to be postponed even longer. If your hair begins to show damage, it is important to trim it more often! Damaged hair doesn't grow, it breaks and if you let it go, the damage will only get worse.

3. If you don't have someone you trust implicitly to trim your hair for you, find a salon that caters to long hair, has a long hair specialist, or at least be sure to glare at your stylist as menacingly as you can while you clearly explain your hair-growth goals before letting her come at you with scissors. It also helps to ask the stylist to show you exactly their perception of the amount of hair you want trimmed by showing you what they think is the same distance from the end of their comb. I am convinced stylists are taught a completely different measuring system from the rest of the world, and not once have I ever had a stylist show me an accurate half inch on her first try. Not once. It also helps to remember, it is not in the best interest of most salons or stylists if you rarely make visits to their salon, which is definitely a conflict of interest! If your hair is short and styled, you are always at the hair salon spending money for maintenance. If your stylist tries to convince you that your long, healthy hair should be cut, run screaming from the salon immediately!
In the end, it is up to you to make sure that anyone whose advice you consider, be it a stylist, friend or family member, has only the best interest of YOUR acknowledged hair growth goals in mind. Otherwise smile politely and ignore every word they say. You absolutely are not too old, too thin, too short, too gray, too anything to have long hair.

4. Avoid using any heated appliances whenever possible. No blow drying, no curling irons, no hot rollers, and especially no flat irons or hair crimpers! If you absolutely must blow dry do so minimally, and contrary to popular belief, it is best to let your hair dry naturally for as long as possible and use the blow dryer just to finish it off at the end. If you must use hot rollers, use flocked or ceramic rollers that are safer for your hair, not spiked plastic rollers (and be sure to read about all the great alternative methods in our Ultimate Guide to Curling Long Hair first!) If you insist on using curling irons, flat irons or hair crimpers on a daily basis, really long healthy hair isn't in your future. If you do use any kind of heat on your hair, be sure to use a product that will help protect your hair from it, but keep in mind that every time you apply heat you are likely to cause some damage.

5. Don't use any harsh chemicals on your hair. Definitely no perms and no peroxide! If you must color, use non peroxide color or 100% natural henna (henna comes in a full range of colors, not just red). In addition to being an all-natural way to add color to your hair, henna will "plump up" and add body to fine hair (but it's best not to use it on very dry hair). Check out our Hair Care Recipes Cookbook too, and learn to make your own organic hair color and products.

Low-peroxide hair color is much less damaging to hair than permanent color, but using these products again and again will eventually detrimentally affect the health of your hair, it is unavoidable. If you do choose to go this route, you will have to be even more diligent about taking care of your hair. Be sure to use a good daily shampoo and conditioner forumlated specifically for color treated hair, which will make your color last longer, which equates to less exposure to damaging chemicals in the end. Using a line of shampoo and conditioner that adds a bit of color to your hair will make it last even longer. And be sure to deep condition your hair often, again using a product forumated especially for color treated hair. With making the color in your hair last as long as possible as the primary goal so as to limit how often you have to use hair color, you may also want to consider using a leave-in color protectant. In the end, it's much safer, and less work and expense, to learn to love the hair color you have, or at least to use a hair coloring product that doesn't contain any peroxide at all. Now, having spoken to hundreds of customers addicted to color over the years, I know how difficult it is to convince you kidz not to use it. That being the case, the least I can do is tell you how to use it while keeping damage at a minimum and long, gorgeous hair in your future. In this instance, 16oz. of prevention is definitely worth a ton of cure.

Lastly and by far most importantly, never perm or straighten your hair for any reason. These products actually break down the chemical structure of your hair and rebuild it... no other chemicals meant to be applied to hair are more damaging. If you want long healthy hair, you just can't use these type of chemicals on it. Ever.


Tips For Healthy Long Hairs

Tips For Healthy Long Hairs

Tips For Healthy Long HairsTips For Healthy Long Hairs
Tips For Healthy Long Hairs

Tips For Healthy Long HairsTips For Healthy Long Hairs
Tips For Healthy Long Hairs
Read more »

Why Women Fail to Attract Men


The major reasons why some women fail to attract others is the under projection of femininity. God has made men and women differently. If a woman talks as loudly as men, where is the femininity? Bring out all your qualities that make you more feminine. That is how you were born. More application of makeup sometimes distracts from natural beauty. If your skin is good, why apply more makeup? Consult a good makeup artist and find out how to accentuate your plus pints and hide your defects. It goes for dress style. Put on dresses that are feminine. Let men wear manly dresses.

Looking attractive is easy, but you may have to change some habits and adopt new styles for that. Once you do that, you will find offers of dates coming to you in plenty.

Why Women Fail to Attract Men

Why Women Fail to Attract Men

Why Women Fail to Attract MenWhy Women Fail to Attract Men
Why Women Fail to Attract Men

Why Women Fail to Attract MenWhy Women Fail to Attract Men
Why Women Fail to Attract Men
Read more »

Latest Cute Teen Girls Hairstyles 2011


If you have short hair or middle long hair you can choose and make cute hairstyles like adorable ponytails, pigtails, braids, pigtails with braids, buns and many others. Perhaps you did not know but the word pigtails is used for at least 400 years and at first it was used as a name of the process of making tobacco for chewing. In the past it was a name for a bad and unhealthy habit, but now it is used for sweet pigtails, which look good on everyone.

Latest Cute Teen Girls Hairstyles 2011

Latest Cute Teen Girls Hairstyles 2011

Latest Cute Teen Girls Hairstyles 2011Latest Cute Teen Girls Hairstyles 2011
Latest Cute Teen Girls Hairstyles 2011

Latest Cute Teen Girls Hairstyles 2011Latest Cute Teen Girls Hairstyles 2011
Latest Cute Teen Girls Hairstyles 2011
Read more »

How to Apply Kajal Tips At Home


How to apply kajal

Kajal is applied with a fingertip on the inner edge of the lower eyelid and sometimes on the upper cap as well. Open your eyes and apply the kajal inside the eye, next to the lower lash line. When applied on the lower inner edge of the eye it can be started from the innermost corner or from the middle to the outer corner of the eye. Kajal is usually put on the lower edge of the eyes for the soft look.

If eye liner is applied over the kajal put on lower edge, it defines the eyes very well.
Length of applying Kajal.

Choose the length which suits you. You may wear kajal along the full length of the eye or even keep it shorter-3/4, 1/2 or 11/4 of the eye.

To make small eyes look bigger put only 1/2 length-starting from middle to the outer corner of eye.

How to Apply Kajal Tips At Home

How to Apply Kajal Tips At Home

How to Apply Kajal Tips At HomeHow to Apply Kajal Tips At Home
How to Apply Kajal Tips At Home

How to Apply Kajal Tips At HomeHow to Apply Kajal Tips At Home
How to Apply Kajal Tips At Home
Read more »

Stunning Eye Makeup within 10 Mins

Here’s how to do a stunning eye makeup for evening in just 10 minutes:

Step 1: Firstly, apply three dots of concealer under each eye. Starting from the inner corner where skin tends to be darkest, then under the pupil and the third on the outer edge. Pat, never rub with your ring finger until it disappears.

Step 2: Now, apply eye base to your eye lid. It will fix the eye shadow for hours.

Step 3: Apply a three-toned eye shadow. Start with a light color, then use a medium color and finally, end with a darker color. Let them blend well.

Step 4: Put on the eyeliner.

Step 5: Now, use a highlighter to pop your eyes. For this, draw a v-shape from top to bottom and blend with your fingers.

Step 6: Now highlight your eye brow with the same highlighter.

Step 7: Curl your lashes with an eyelash curler.

Step 8: Lastly, put on the mascara on your lashes.

And that’s all.. You’re done with stunning, dramatic eye makeup.

Stunning Eye Makeup within 10 Mins

Stunning Evening Eye Makeup within 10 Mins
Stunning Eye Makeup within 10 Mins

Stunning Evening Eye Makeup within 10 MinsStunning Evening Eye Makeup within 10 Mins
Stunning Eye Makeup within 10 Mins

Stunning Evening Eye Makeup within 10 MinsStunning Evening Eye Makeup within 10 Mins
Stunning Eye Makeup within 10 Mins
Read more »